
The problem
I run a Thinkpad P14s Gen 2 laptop with a Synaptics touchpad. I wanted to upgrade the firmware of the touchpad to fix some issues I had with palm detection. The problem is that Synaptics only provides a Windows tool to flash the firmware. There is no Linux tool available.
Using fwupd to upgrade Synaptics firmware is not an option, as Synaptics is not listed as a supported vendor in the fwupd supported devices list.
The solution
I need to run Windows to run the Synaptics firmware upgrade tool. I don’t want to dual boot or to write to my hard drive. My computer drivers and firmwares are available on Lenovo official website. The trackpad driver is mandatory to run the firmware upgrade tool so both must be installed.
Download windows ISO
First of all we need a Windows ISO. Microsoft provides a Windows 10 disk image (ISO file) for free download. You can download windows 11 but I’d rather have the lighter version possible. The trick is when you are running another OS than windows the page displays the ISO download button but when you are going to the same web page using a windows computer it only proposes the media creation tool option.
I could provide the direct link for the image download but it is only valid for 24h | Links valid for 24 hours from time of creation.
Using a Windows VM: Spoiler it does not work
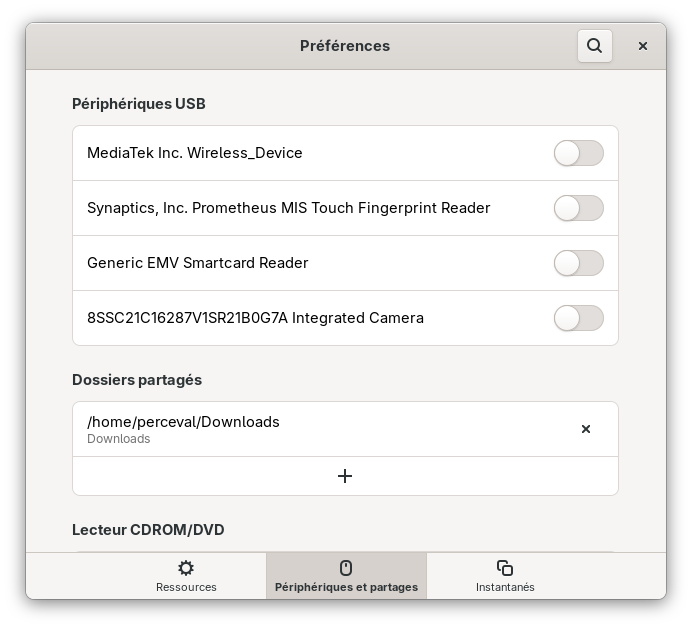
I thought I could use a Virtual Machine and connect the trackpad as Hardware Sharing. I directly used Gnome Boxes as it was already installed. I am used to Virtual Box but I wanted to try something different. I created a new Windows 10 VM with at least 4 CPU, 8GiB of RAM and an at least 40GiB disk. I installed windows using the previously downloaded ISO. Then I installed the Synaptics driver and the firmware upgrade tool from Lenovo website. I then enabled the trackpad hardware sharing using the virtual machine preferences menu in “peripheral and sharing”.
The tool did not detected the touchpad. I guess the VM does not provide low level access to the touchpad hardware.
Using a Windows live USB: It works!
Windows used to have a feature called windows to go which let you boot to windows from a USB key. This feature is not available anymore but we can create a bootable windows USB key using the media creation tool rufus. The issue is rufus only runs on windows. Therefore I used the previously created virtual machine to run rufus.
Media creation
In order to create a bootable windows USB key I connected my USB key to the VM using the hardware sharing menu. Then I downloaded and ran rufus inside the VM. I couldn’t use the folder sharing feature of boxes to share my previously downloaded ISO. thankfully rufus allows you to download it directly.
For all the details I followed this exact tutorial
on the Windows User Experience menu I selected all options. I think that the “Prevent Windows To Go from accessing internal disks” prevented me to access my EFI partition using graphical tools. I advise you to disable this option. I finally manage to access my EFI partition using command line tools even though the option was enabled. We will see that in a moment.
Pre-download driver and firmware
When I booted the computer from the USB key I had the final steps of windows installation running from the USB key. I took a while to complete (more than 15 minutes). Once I was on the windows desktop I discovered that I had no internet access because of missing WiFi drivers. In order to avoid such issues, you should download all necessary drivers before creating the USB key. Then after the key is created you can copy directly touchpad driver and firmware to the USB key EFI partition as it is formatted as FAT32 and therefore accessible from linux.
To access EFI partition from linux you can open the disk utility application, select the first partition of the USB key and click on the play button. It will mount the partition and it will be accessible through file browser. You can always mount it using command line if you prefer that.
Once the partition is mounted you can copy the driver and firmware files to it. You can ignore wifi driver.
Boot from USB key
Now that the USB key is ready you can reboot your computer and boot from the USB key. On Thinkpads you can access the boot menu by pressing F12 at boot time. Select USB key drive and let it finish the windows setup.
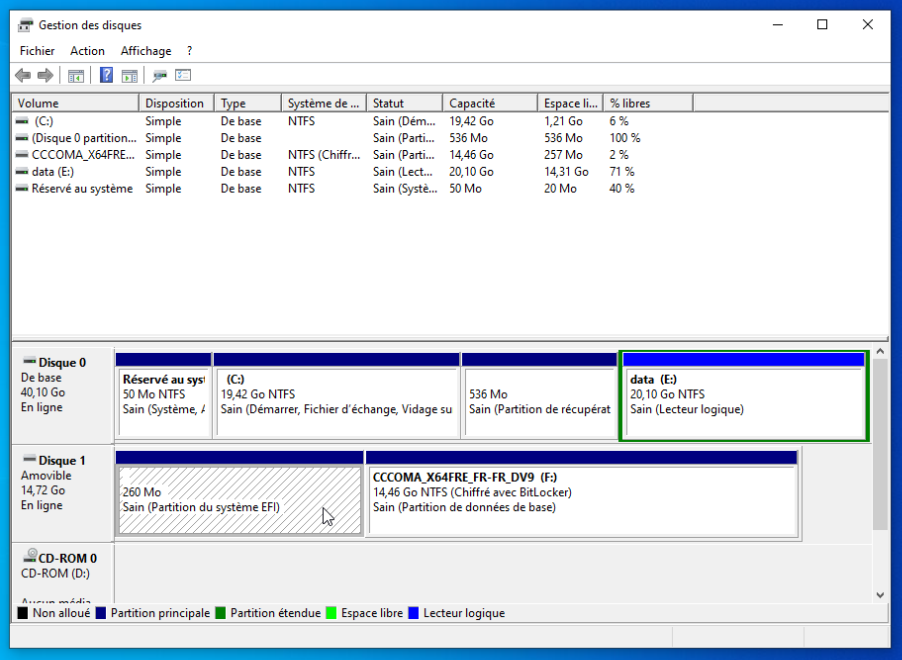
Once you are on the windows desktop you need to access the EFI partition. You can try using the graphical tool: - Open start menu - Type “Disk Management” and press enter - In the disk management window locate your USB key drive - Right click on the EFI partition (the first in line) and select “Change drive letter and paths…” - Assign a drive letter to the partition and validate
For more infos and details you can refer to the official tutorial from microsoft.
If it does not work you (all options in right click menu are greyed out) you can use command line:
- Open start menu
- Type powershell, right click on command prompt and select “Run as administrator”
- In the command prompt type ‘diskpartand press enter - In diskpart typelist volumeand press enter - Locate your USB key EFI partition in the list (it should be FAT32 and around 100MiB) - Typeselect Xwhere X is the number of the EFI partition - Typeassign letter=Eto assign the letter E to the partition (you can choose another letter if E is already taken) - Typeexit` to leave diskpart
For more info you can follow this tutorial
You should be able to open the file explorer and navigate to the EFI partition from “My Computer”. If it is not visible you can type E: in the address bar to access it directly. If you do not have enough rights to open the partition you can access it using powershell with administrator rights. In the terminal type E: to access the partition then dir to display current files and folders. You can navigate to the right folder using cd command like on Linux. Once you find the driver and firmware installers you can copy them to your Download folder using cp command:
cp xxx.exe C:\Users\my_user\Downloads\
Driver and firmware installation
Install the touchpad driver by running the setup executable. You will need to reboot. Keep the key plugged in. Once rebooted run the firmware upgrade tool. Et voilà!
Conclusion
Flashing Synaptics touchpad firmware under Linux is possible but requires some workarounds. Using a Windows Virtual Machine and a Windows live USB created with rufus is the easiest way to achieve this without installing Windows on your hard drive.